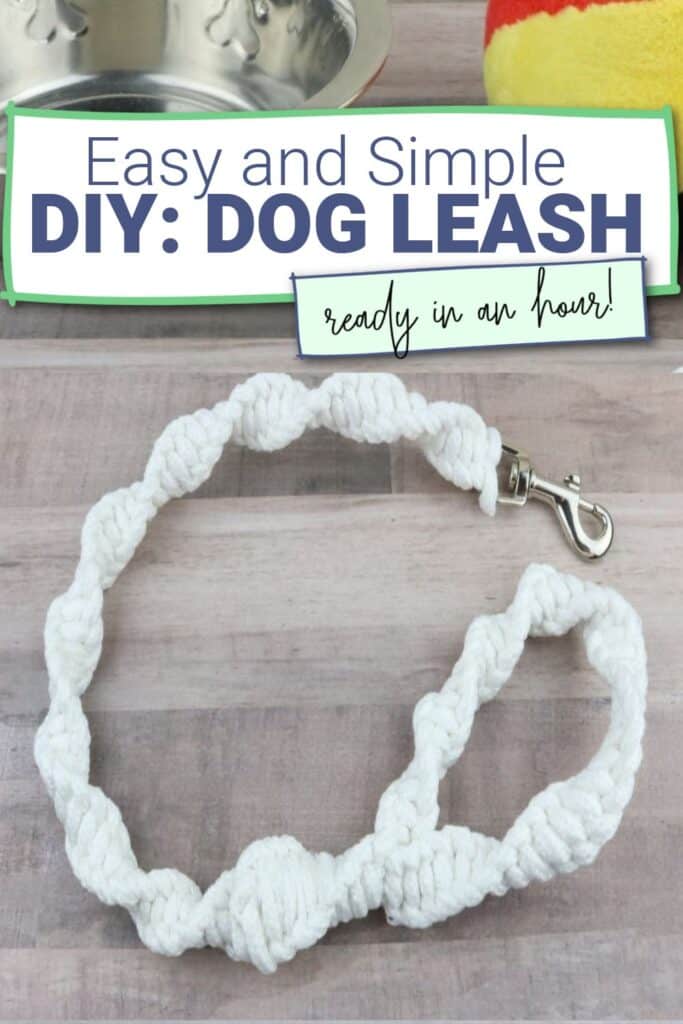
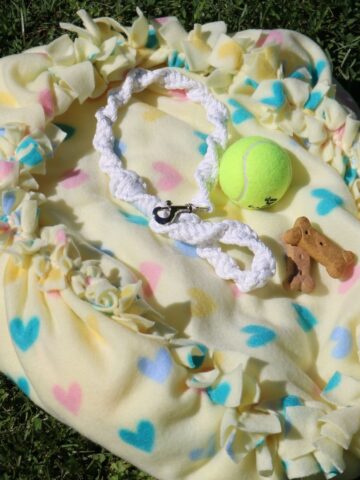
A good dog leash is one of the most important things in your dog's life.
Leashes are a useful safety and training tool, and they allow your dog to get the regular exercise he needs. It's always good to have a few leashes on hand, so you're ready for any situation.
For example, if you're hiking in an open area, you may want a long lead to use, but a standard 6-foot one will work fine for daily walks.
Many pet owners prefer to make their own DIY leash at home.
We’ll try to help you do this below, as we go through making one of the easiest dog leashes in about an hour’s time.
Tips for Making a DIY: Dog Leash with Clothesline
You can get everything you need for this project at your local hardware store, including the clothesline and the swivel hook, or order it off of Amazon for quick delivery.
While you are making your own dog leash, we recommend attaching the hook to something to make braiding easier.
While we’re leaving the leash plain, you can easily decorate the leash to give it a bit of personality. So get creative!
To add a key chain, simply slip a key ring into the braid in the rope.
Steps for Making a DIY Dog Leash
Supplies Needed:
- 30 feet of cotton-poly blend clothesline *
- Scissors
- 1 Dog Snap
NOTE: * 30 feet of cotton-poly blend clothesline makes about a 2 feet long leash when done. If you'd like a longer leash, simply use a longer line. You'll want to make sure that the line is about five times longer than the center part of the line.
Directions:
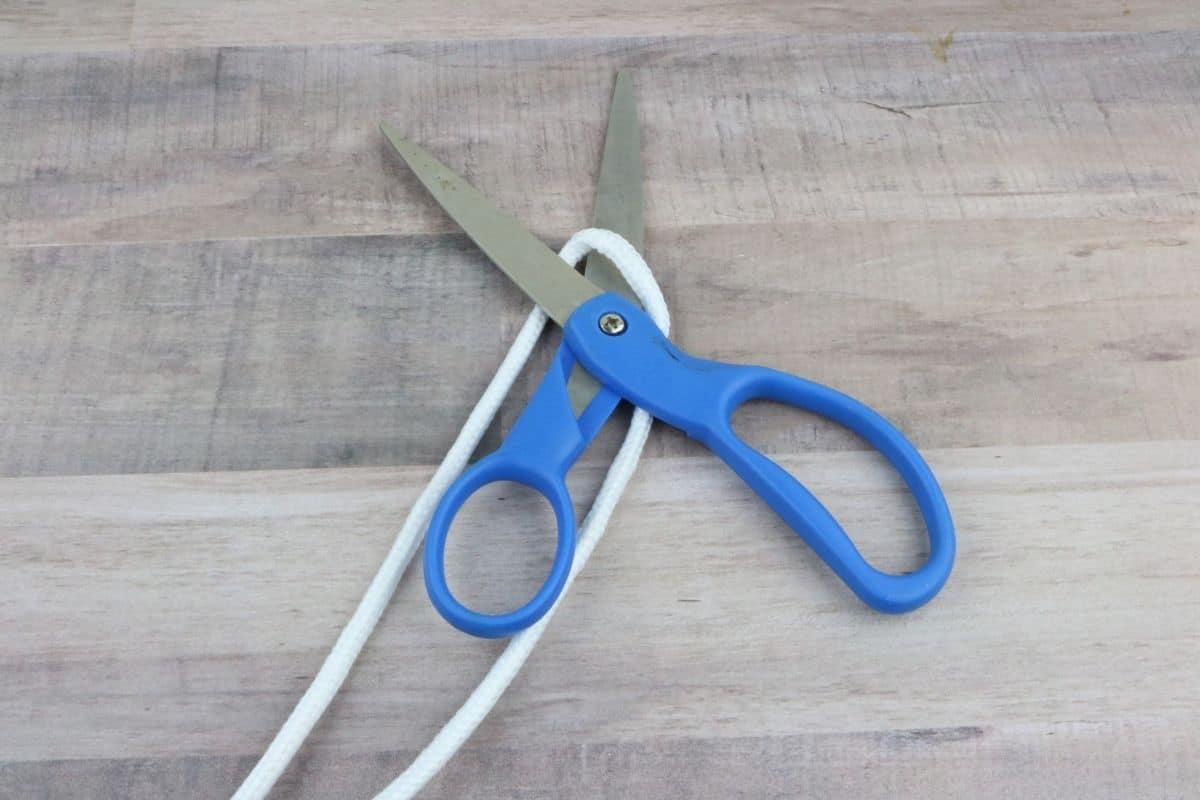
Step 1: Begin by cutting 30 feet of clothesline in half.
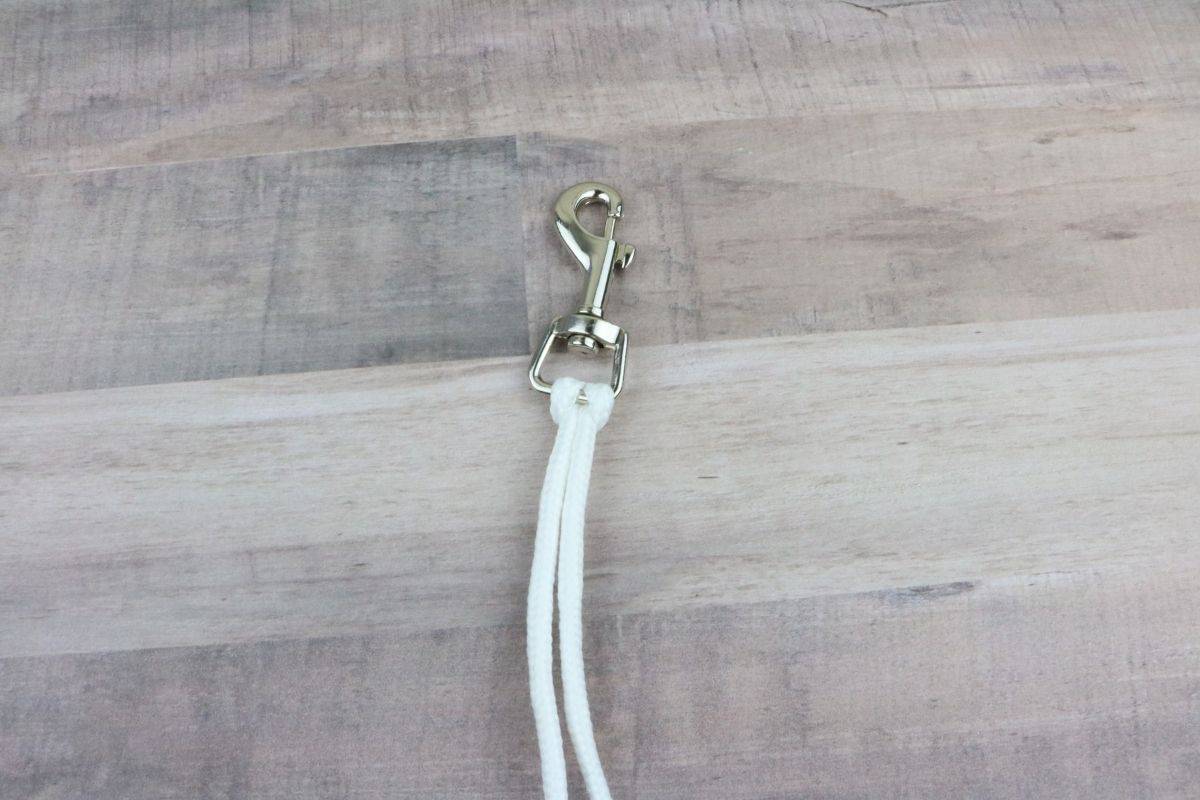
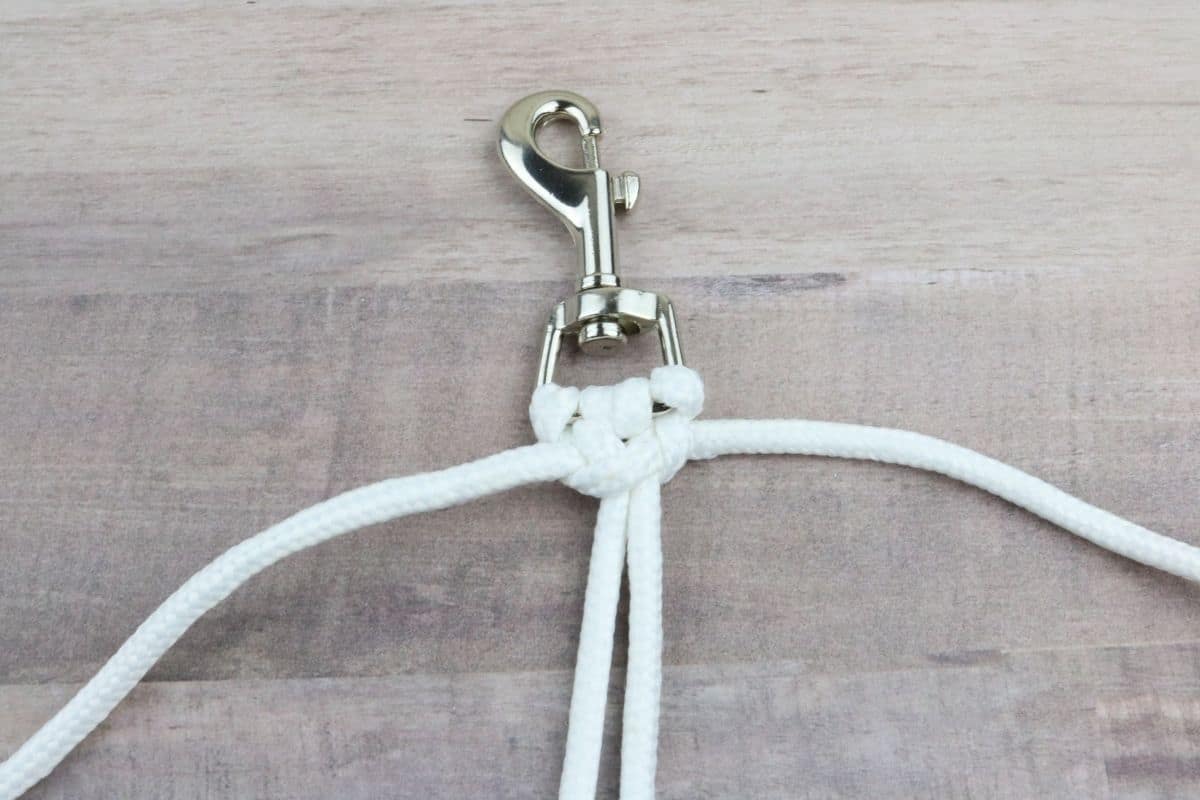
Step 2: Take one piece and fold it so there is about 30-inches on one side while the rest is on the other side. Then push the loop through the hook. Tip: Make sure you have it so the 30-inch line is in the center of the hook and not the outside.

Step 3: Next, run the ends of the line through that loop.
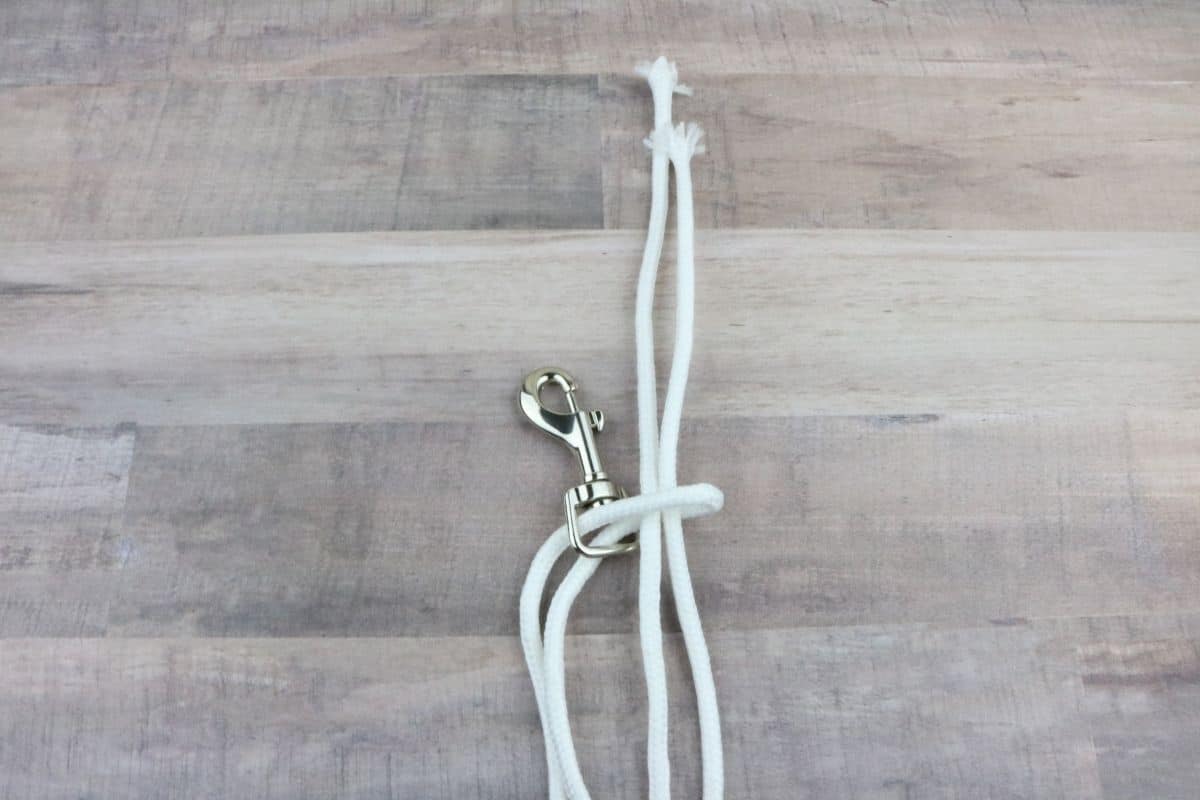
Step 4: Pull the ends just until the line/loop is tight on the hook to hold it in place.
Step 5: Do the same with the other line. Make sure that the 30-inch side is in the center with the other one.
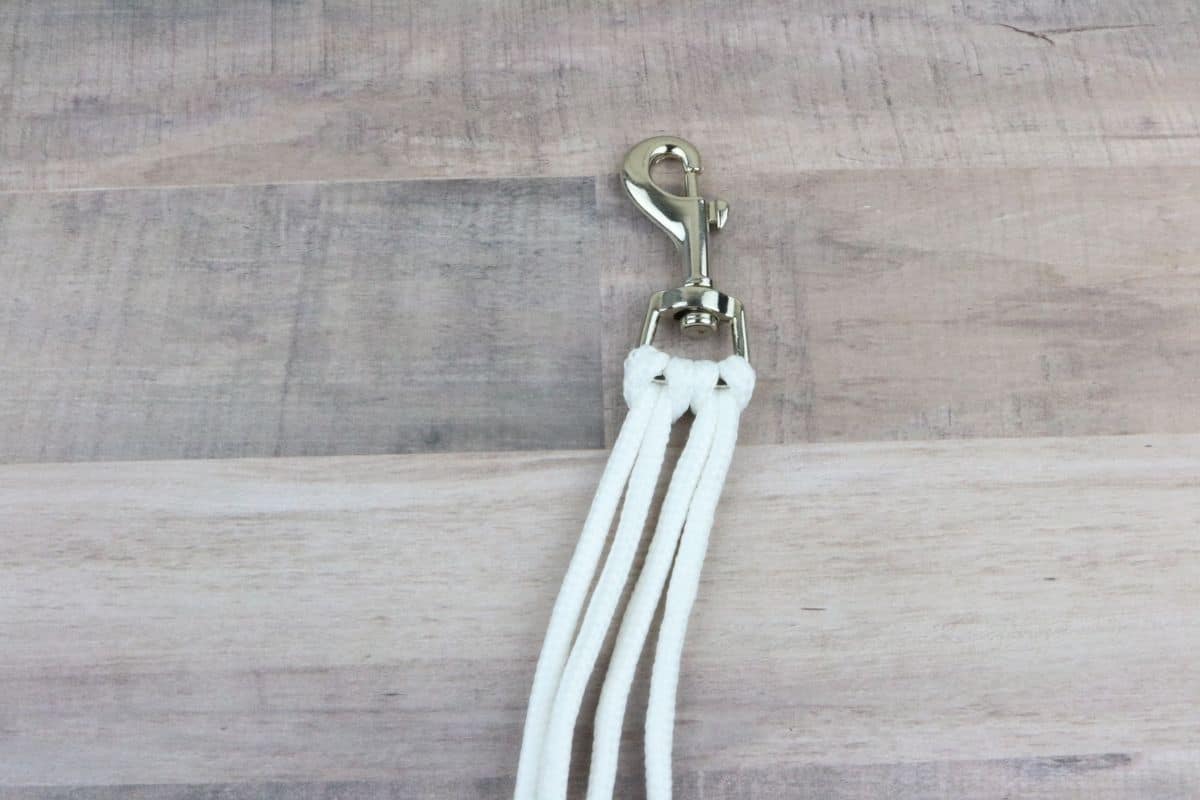
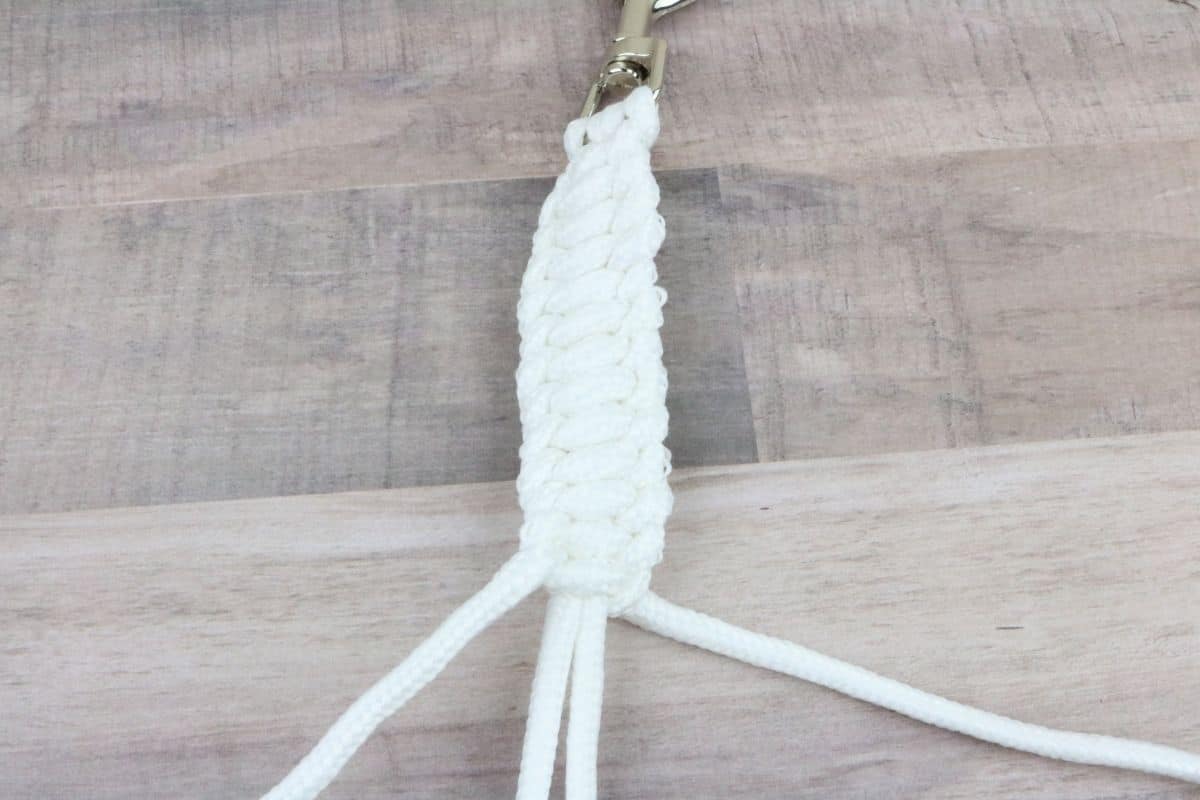
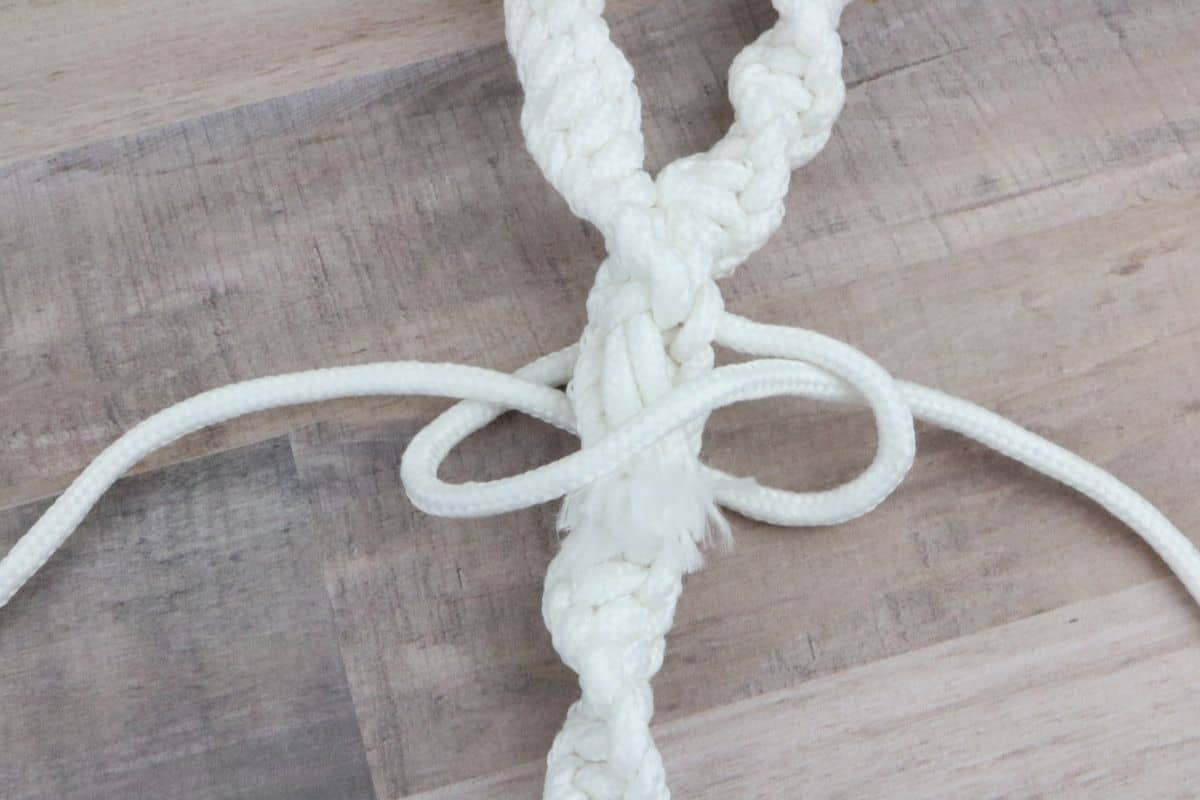
Step 6: Take the outer line on the right and run it behind all the others this way there is a loop on the right. Take the line on the left and run it over top them all so there is a loop on the left. Then take the top line and run it through the loop on the right and the bottom line, pull it through the loop on the left.
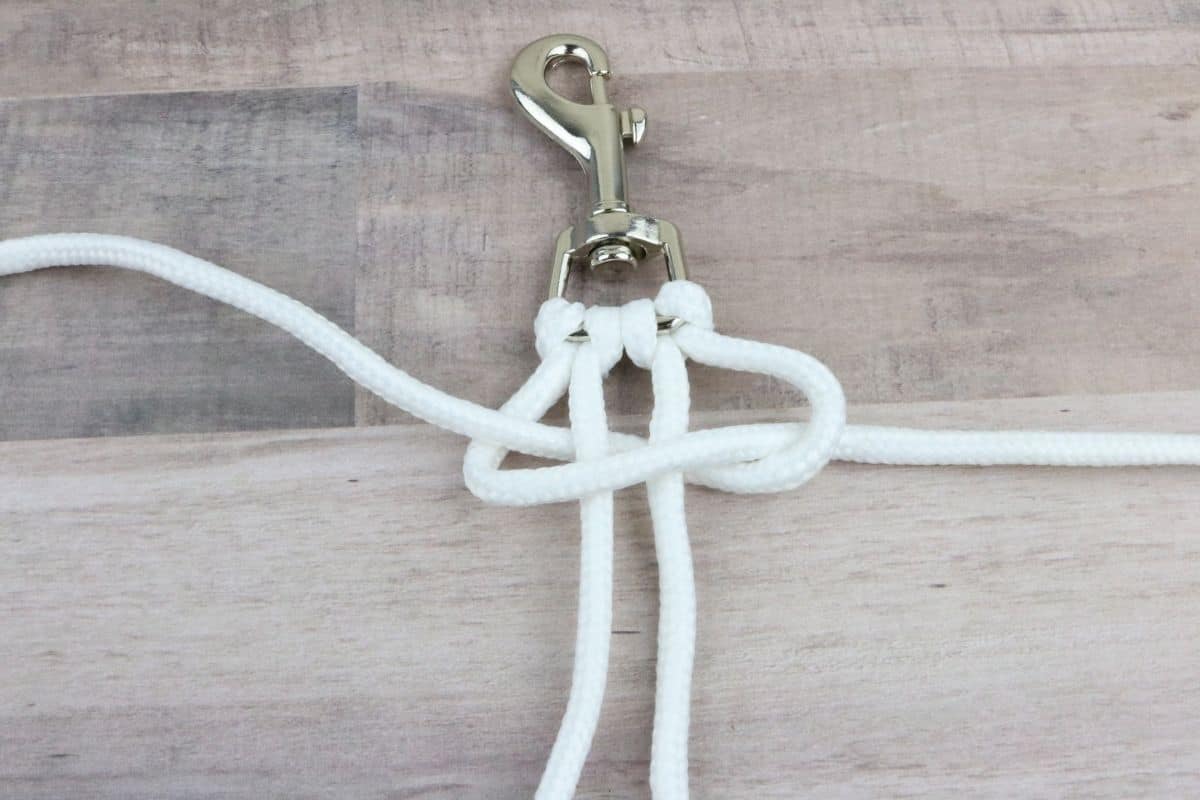
Step 7: Pull both lines so they are nice and tight.
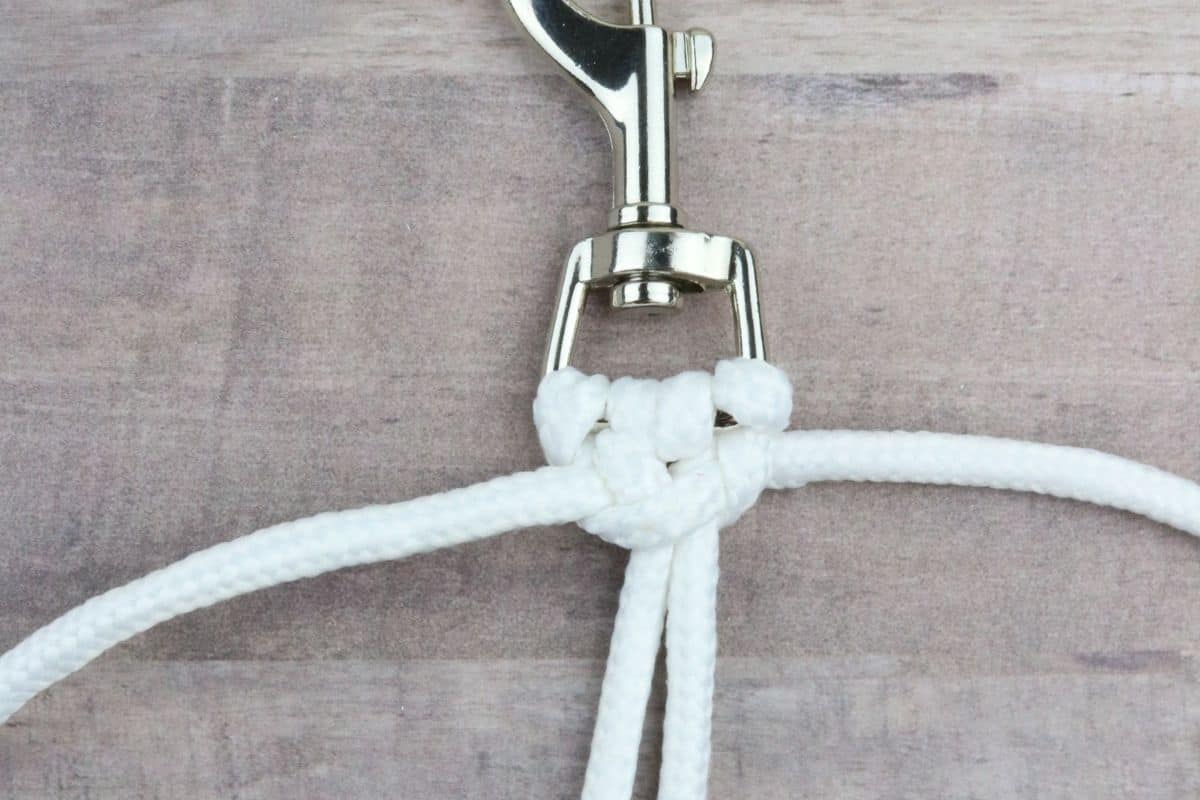
Step 8: Keep repeating steps 6 & 7.
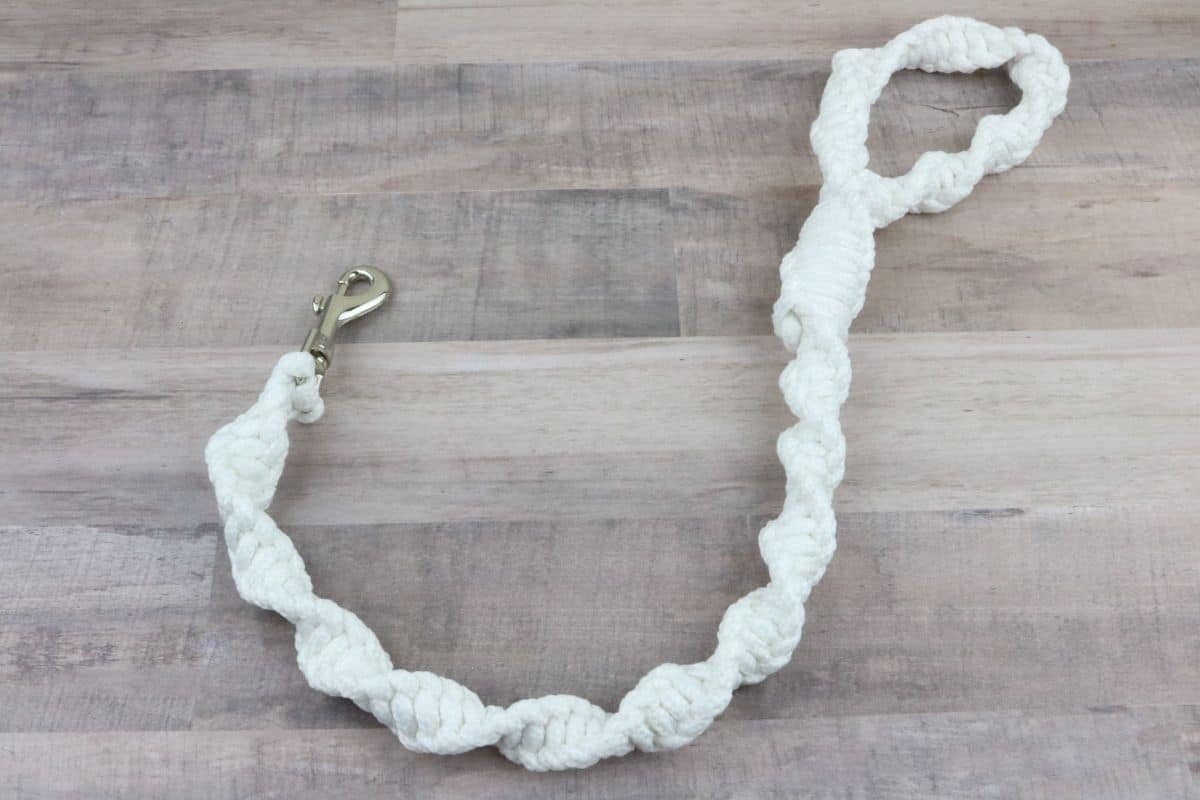
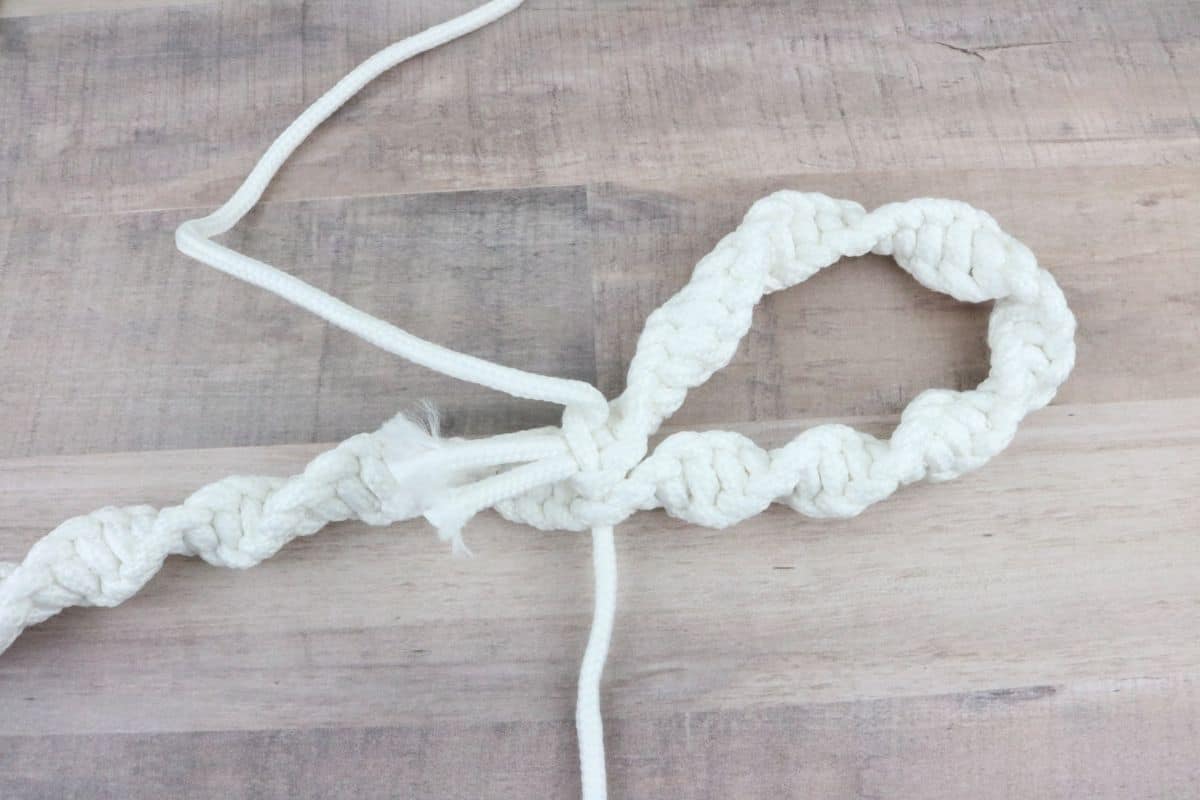
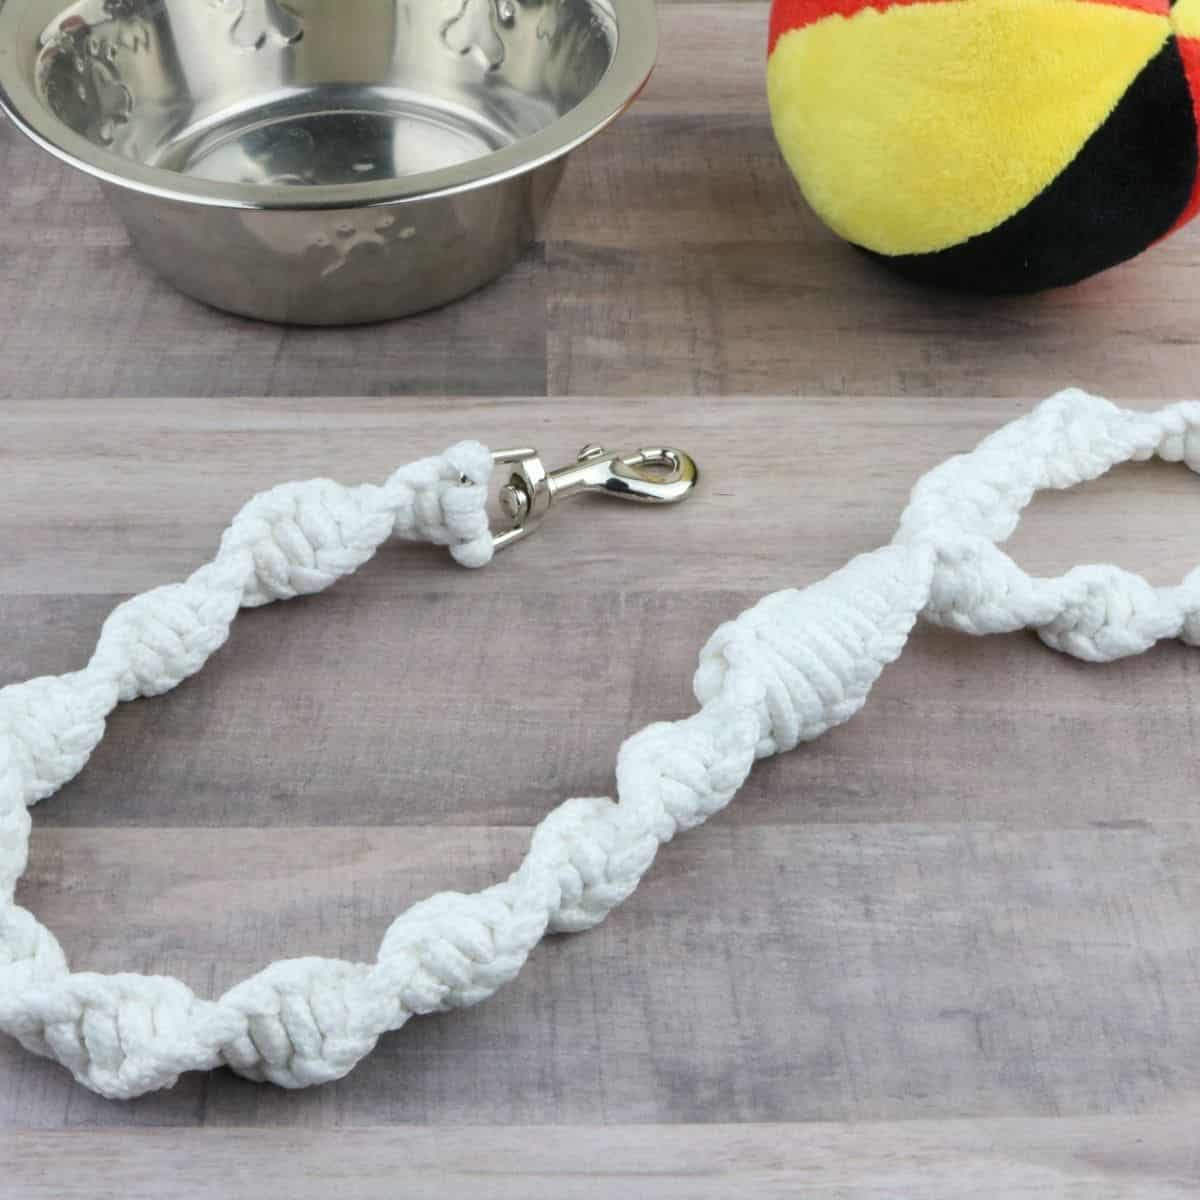
Step 9: It should now look like this picture when you've completed about 13 ties. As you go, it will twist on its own.
Step 10: Stop when you get about the ends of the center lines. The ones that are 30-inches.
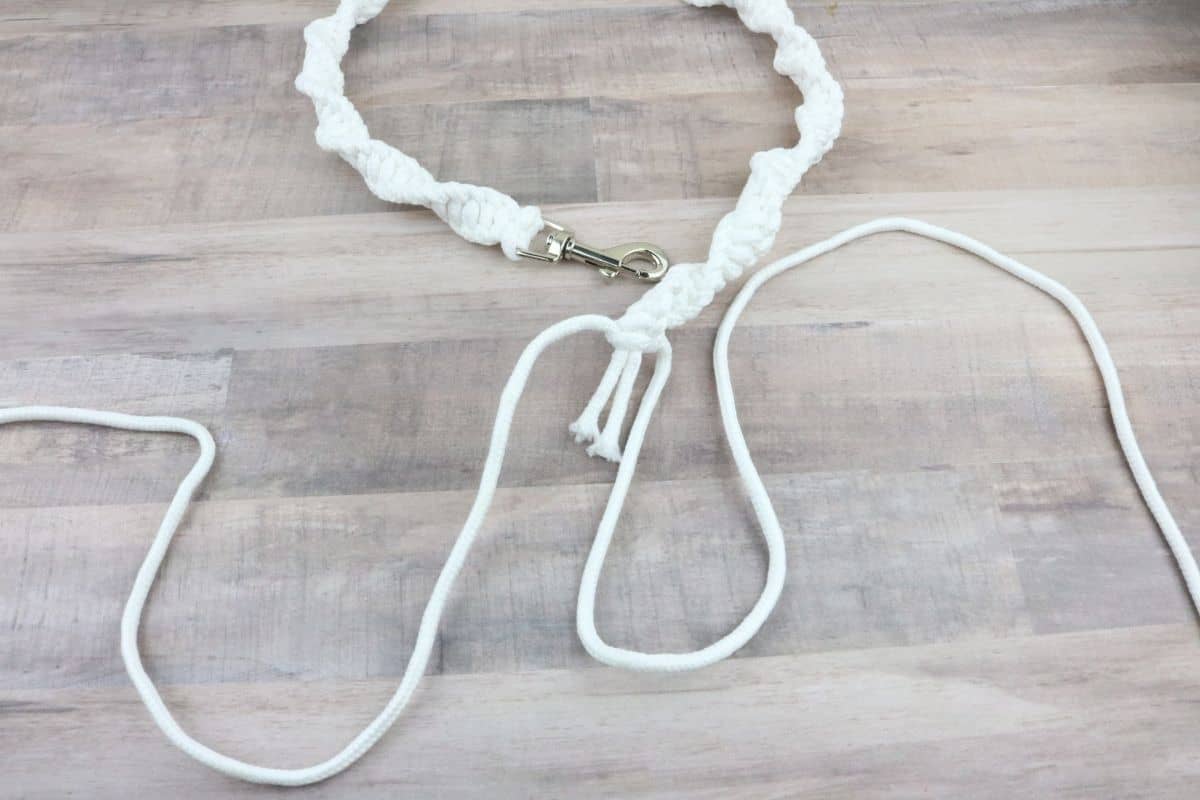
Step 11: Fold the end over to form a handle. I like to make my handle about 4-inches. Run the long ends through the side loops of the leash to join the handle to the leash.
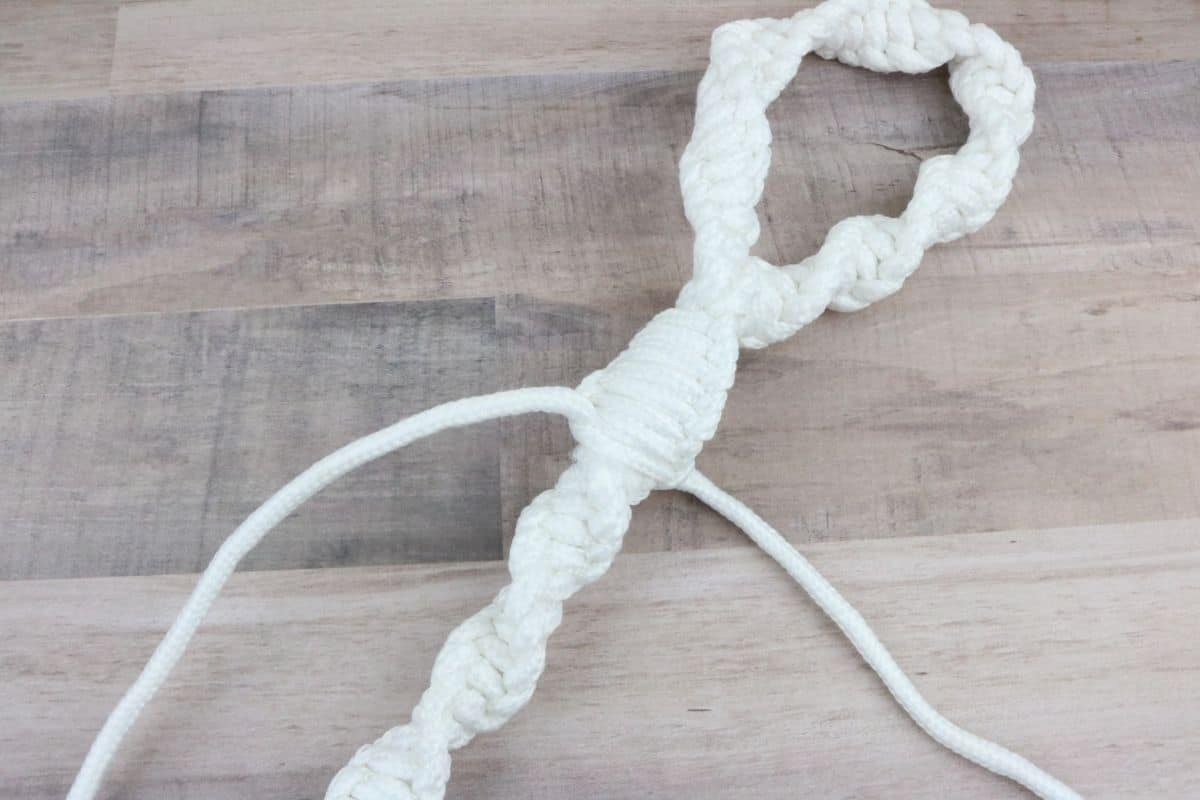
Step 12: Now do steps 6 & 7. This time we will not only be covered over the small parts of the centerline that are left, but we will also wrap the leash as well.
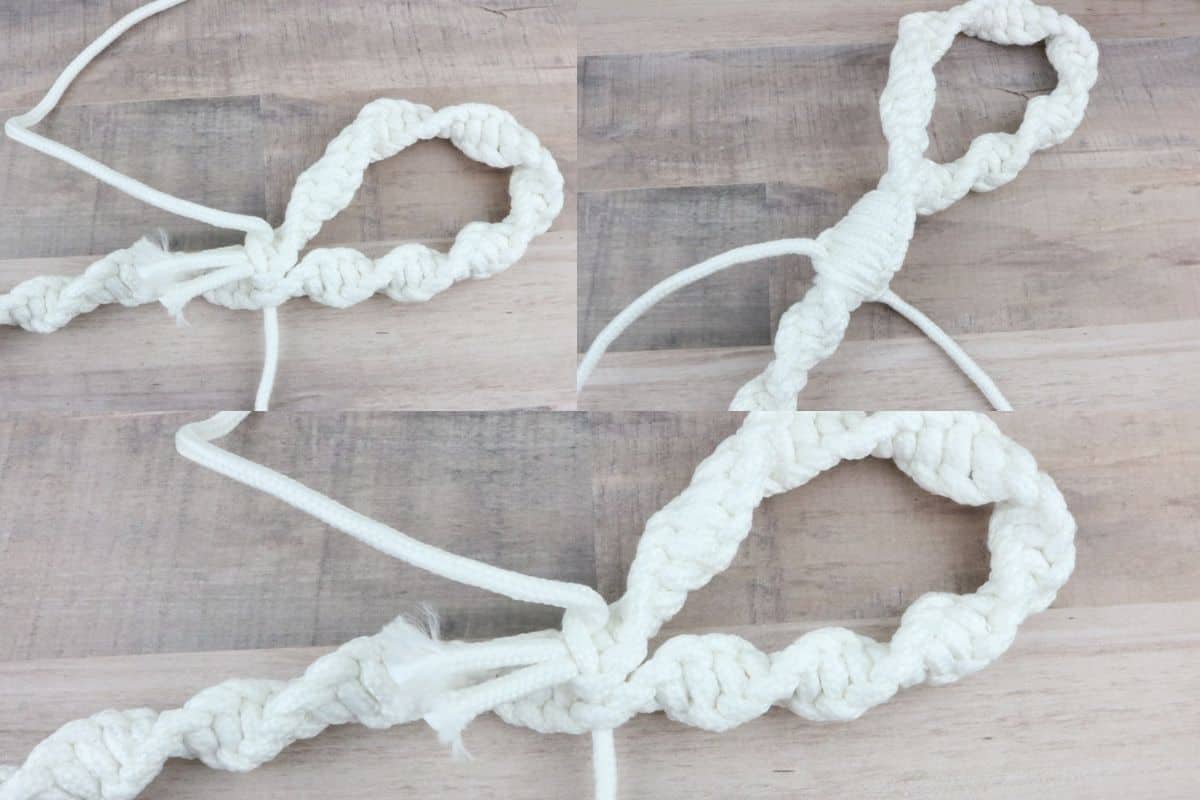
Step 13: Keep repeating the steps until you have about 6-inches of line left. Should be about 8-10 knots.
Step 14: Tightly tie the two lines together.
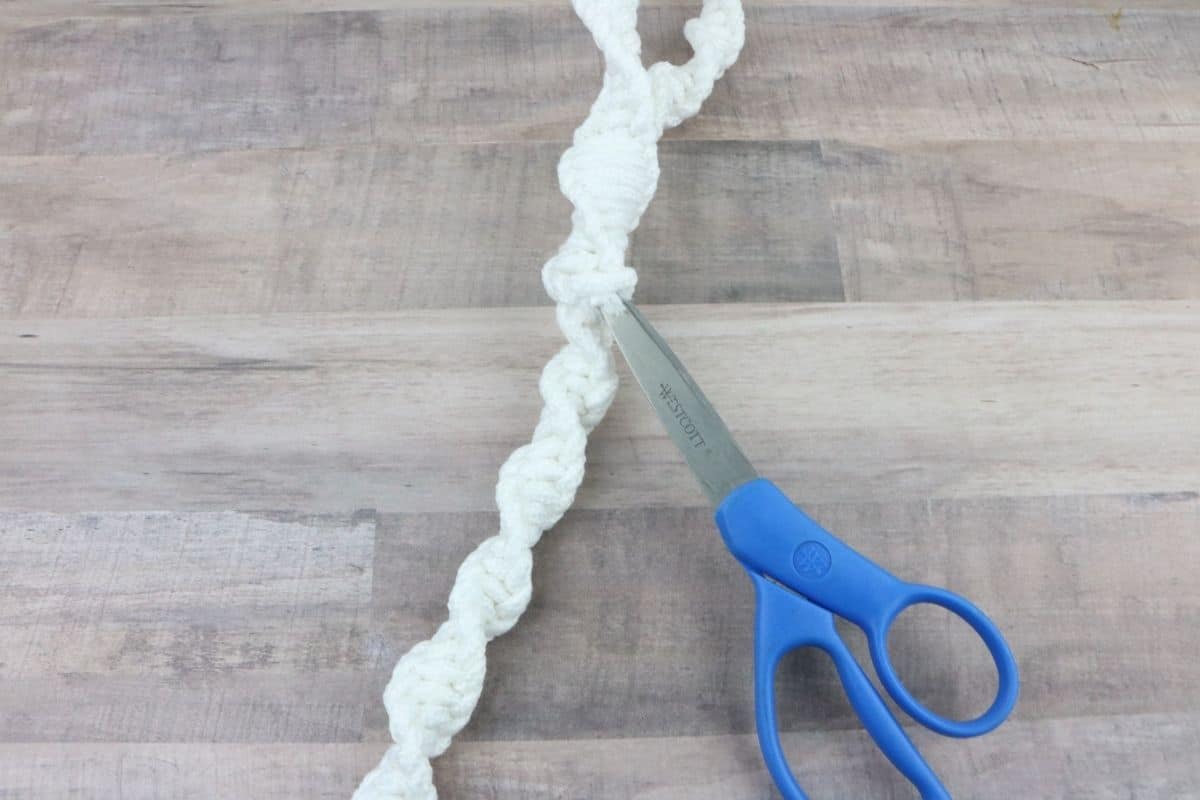
Step 15: Cut off the ends so that it is about an inch long.
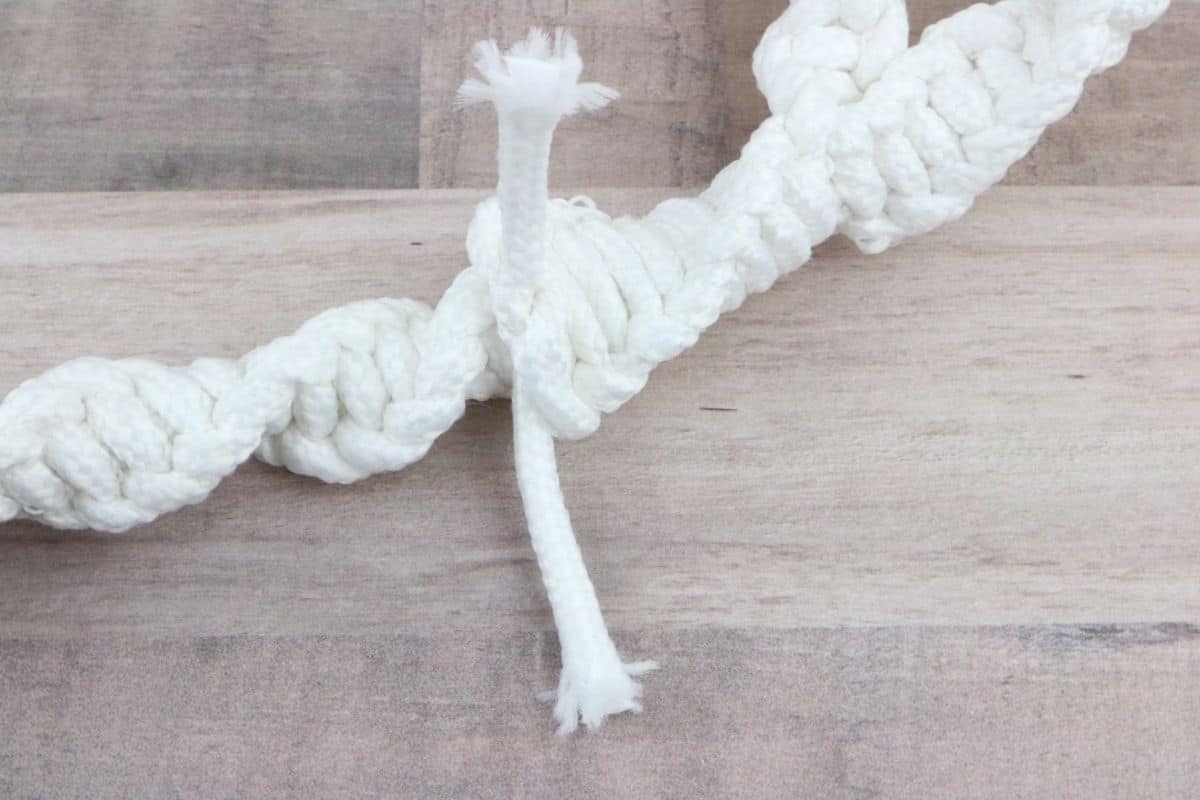
Step 16: Take the ends of the scissors or another like object and tuck the ends under the knots you just made to hide them.
Printable DIY: How to Make a Dog Leash with Clothesline
📖 Recipe
DIY: How to Make a Dog Leash with Clothesline
A good leash is one of the most important things in your dog's life.
Materials
- 30 feet of cotton-poly blend clothesline
- Scissors
- 1 Dog Snap
Tools
- Scissors
Instructions
Step 1: Begin by cutting 30 feet of clothesline in half.
Step 2: Take one piece and fold it so there is about 30-inches on one side while the rest is on the other side. Then push the loop through the hook. Tip: Make sure you have it so the 30-inch line is in the center of the hook and not the outside.
Step 3: Next, run the ends of the line through that loop.
Step 4: Pull the ends just until the line/loop is tight on the hook to hold it in place.
Step 5: Do the same with the other line. Make sure that the 30-inch side is in the center with the other one.
Step 6: Take the outer line on the right and run it behind all the others this way there is a loop on the right. Take the line on the left and run it over top them all so there is a loop on the left. Then take the top line and run it through the loop on the right and the bottom line, pull it through the loop on the left.
Step 7: Pull both lines so they are nice and tight.
Step 8: Keep repeating steps 6 & 7.
Step 9: It should now look like this picture when you've completed about 13 ties. As you go, it will twist on its own.
Step 10: Stop when you get about the ends of the center lines. The ones that are 30-inches.
Step 11: Fold the end over to form a handle. I like to make my handle about 4-inches. Run the long ends through the side loops of the leash to join the handle to the leash.
Step 12: Now do steps 6 & 7. This time we will not only be covered over the small parts of the centerline that are left, but we will also wrap the leash as well.
Step 13: Keep repeating the steps until you have about 6-inches of line left. Should be about 8-10 knots.
Step 14: Tightly tie the two lines together.
Step 15: Cut off the ends so that it is about an inch long.
Step 16: Take the ends of the scissors or another like object and tuck the ends under the knots you just made to hide them.


Leave a Reply